
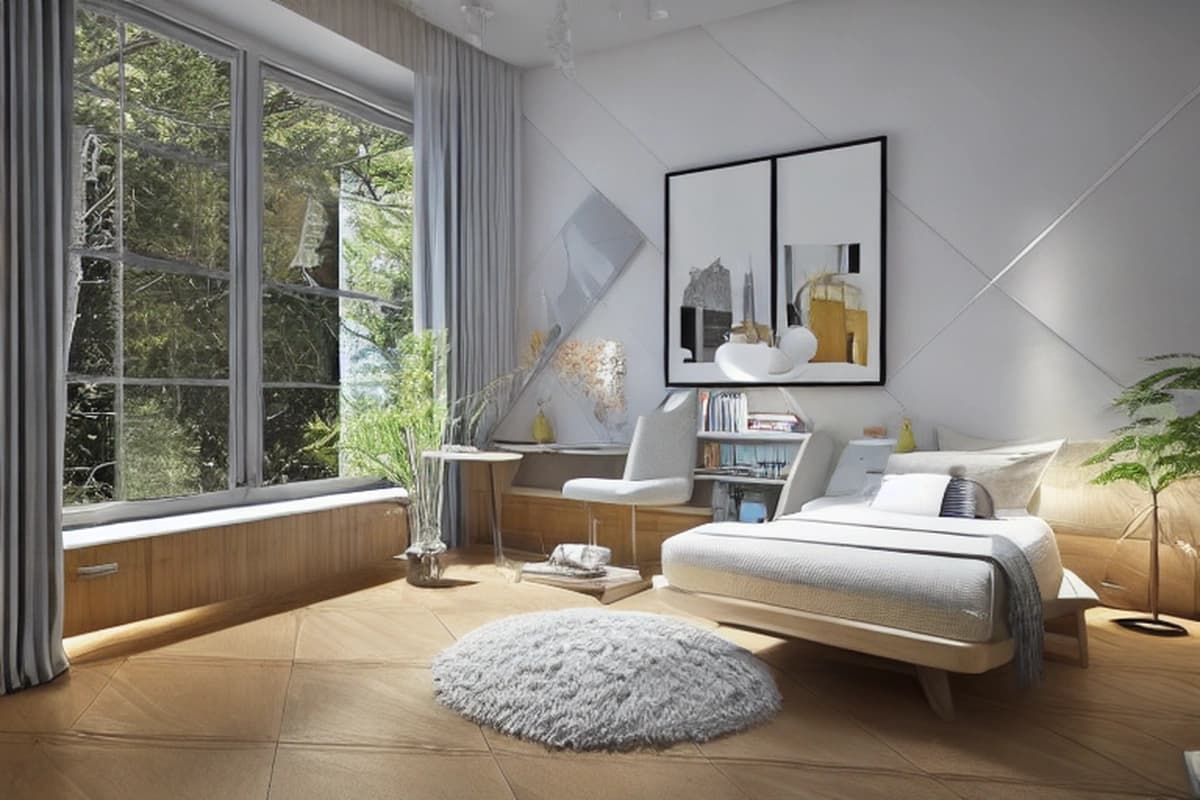
Wabi Sabi Vs Industrial Interior Design | AI Room Planner

الميكروسيمنت بأسلوب وابي-سابي مقابل التصميم الصناعي: دليل القرار 2026
الميكروسيمنت بأسلوب وابي-سابي مقابل التصميم الصناعي: دليل القرار 2026
الخلاصة السريعة: إذا كنت تريد أرضية أو جداراً متصلاً بمظهر هادئ، ترابي، قليل الفواصل، فإن الميكروسيمنت بأسلوب وابي-سابي يناسب غرف المعيشة والمداخل والحمامات عندما تكون الركيزة مستقرة ويُنفذ نظام التشطيب كاملاً وفق مواصفاته. أما إذا كانت الخرسانة والطوب والمعدن المكشوفة جزءاً حقيقياً من المبنى، فإن التصميم الصناعي يسمح بإظهار المادة الأصلية بدلاً من تغطيتها. سماكة أحد أنظمة الميكروسيمنت المنشورة تتراوح بين 0.5 و3 مم، مع حد أقصى يبلغ 1 مم للطبقة الواحدة، وبيانات اختبار تشير إلى مقاومة اهتراء AR 0.5 وقوة التصاق ≥1.5 نيوتن/مم². هذه الأرقام تخص نظاماً محدداً وليست ضماناً لكل المنتجات.
القرار لا يبدأ من اللون. يبدأ من الركيزة.
إذا كانت الأرضية تتحرك أو تحتوي على فواصل تمدد أو رطوبة غير معالجة، فلن يحل الميكروسيمنت المشكلة بمجرد تغطيتها. وإذا كانت الغرفة مليئة بالخرسانة والزجاج والمعدن والأسطح الصلبة، فلن يجعل اختيار وابي-سابي المكان هادئاً صوتياً من تلقاء نفسه. في غرفة المعيشة السكنية، تشير إرشادات صوتية منشورة إلى هدف يقارب 0.5 ثانية أو أقل لزمن الارتداد، مع نطاقات عملية تقارب 0.5–0.6 ثانية بحسب حجم الغرفة ومعيار التقييم.
لهذا يقارن هذا الدليل بين الأسلوبين على أربعة محاور عملية: حركة الركيزة، الصوت، التكلفة، ثم قابلية التنفيذ والتنسيق البصري.
مصفوفة القرار: أين ينجح كل أسلوب؟
الميكروسيمنت يوفر سطحاً متصلاً بسماكة صغيرة، بينما يعتمد التصميم الصناعي على إظهار المواد الأصلية؛ لذلك يتغير القرار بحسب حالة الركيزة ومستوى الصيانة والصوت الذي تستطيع الغرفة تحمله.
| معيار القرار | الميكروسيمنت بأسلوب وابي-سابي | التصميم الصناعي | ما الذي يجب فحصه قبل التنفيذ؟ |
|---|---|---|---|
| اللغة البصرية | هادئة، ترابية، موحدة نسبياً، مع آثار تطبيق مقصودة | خرسانة، طوب، معدن، خشب وعناصر تقنية ظاهرة | هل توجد مادة أصلية تستحق الإظهار؟ |
| الفواصل | قليلة بصرياً، لكن فواصل الحركة لا تختفي وظيفياً | يمكن إظهار الفواصل والتقاء المواد كجزء من التصميم | تحديد جميع فواصل الحركة قبل التشطيب |
| السماكة | نحو 0.5–3 مم في نظام منشور، مع طبقات رقيقة متعددة | لا توجد سماكة موحدة؛ تعتمد على المادة الأصلية | مواصفة النظام لا الاسم التجاري فقط |
| الركيزة | تحتاج إلى سطح جاف، نظيف ومستقر | يمكن إبقاء الخرسانة أو الطوب الأصلي إذا كانت حالتهما مناسبة | رطوبة، تشققات، انفصال، تفاوت |
| الصوت | سطح صلب؛ يحتاج إلى سجاد ومنسوجات أو امتصاص صوتي عند الحاجة | الخرسانة والمعدن والزجاج والطوب قد تزيد الانعكاسات | قياس أو تقدير RT60 |
| الصيانة | تنظيف لطيف وإعادة حماية عند الحاجة حسب السيلر | تختلف حسب الخرسانة، المعدن، الطلاء والطوب | نوع التشطيب النهائي |
| التكلفة | تتأثر بالتحضير وعدد الطبقات والتفاصيل | قد تكون منخفضة إذا كانت المواد الأصلية جاهزة، أو مرتفعة عند الترميم | تكلفة الإصلاح قبل التشطيب |
| أفضل استخدام | غرفة معيشة هادئة، حمام، مدخل، جدار مستمر | لوفت، استوديو، مطعم، مساحة ذات طابع معماري واضح | شخصية المبنى والاستخدام اليومي |
| الاختبار الحاسم في 30 ثانية |
إذا كانت الركيزة مستقرة، ولا توجد رطوبة نشطة، ويمكن الوصول إلى RT60 مريح بإضافة عناصر ماصة، فالميكروسيمنت يصبح خياراً عملياً؛ وإذا كانت الخرسانة أو الطوب الأصليان سليمان ولهما قيمة معمارية، فإبقاؤهما مكشوفين قد يقلل أعمال التغطية.
اسأل نفسك أربعة أسئلة:
هل يوجد تشقق نشط؟
هل توجد فواصل حركة لا يمكن إلغاؤها؟
هل الغرفة تعاني أصلاً من صدى واضح؟
هل سأغطي مادة أصلية جيدة لمجرد الحصول على لون موحد؟
إذا كانت الإجابة "نعم" على السؤال الرابع فقط، توقف قبل التعاقد. قد يكون التصميم الصناعي المعتمد على المادة الأصلية أكثر منطقية.
إذا كانت الإجابة "نعم" على السؤال الأول، فلا تبدأ بالميكروسيمنت قبل تشخيص الحركة.
إذا كانت الإجابة "نعم" على السؤال الثالث، أضف ميزانية صوتية إلى المشروع من اليوم الأول.
ما الذي يعنيه وابي-سابي عند استخدام الميكروسيمنت؟
الوابي-سابي الناجح يعتمد على تفاوت محدود وملمس طبيعي، لا على تحويل كل سطح إلى خرسانة رمادية؛ لذلك تعمل الدرجات الترابية والخشب والأقمشة الطبيعية مع الميكروسيمنت بصورة أكثر توازناً من الإفراط في الأسطح الصلبة.
وابي-سابي ليس لوناً محدداً ولا وصفة تشطيب واحدة. هو اتجاه جمالي يعطي قيمة للبساطة، والمواد الطبيعية، وآثار الحرفة، والتفاوت غير المبالغ فيه.
لهذا يمكن أن تعمل معه درجات مثل:
الرمادي الدافئ.
البيج الرملي.
الطيني الفاتح.
الرمادي الحجري.
البني الرمادي.
درجات الجص منخفضة التشبع.
لكن هناك تمييزاً مهماً يجب الحفاظ عليه:
الأثر الحرفي المقصود ليس عيباً تنفيذياً.
تفاوت بسيط في حركة المالج قد يكون جزءاً من التصميم. أما التشقق الذي يتحرك مع الركيزة أو التقشر الناتج عن ضعف الالتصاق أو الرطوبة فهو مشكلة يجب علاجها.
هذه النقطة مهمة لأن محاولة جعل وابي-سابي "غير مثالي" قد تؤدي أحياناً إلى تجاهل العيوب التي يجب ألا تبقى.
قاعدة الألوان 60-30-10 مع الميكروسيمنت
قاعدة 60-30-10 تساعد على منع الميكروسيمنت من تحويل الغرفة كلها إلى كتلة لونية واحدة؛ اجعل نحو 60% من المشهد قاعدة هادئة، و30% لوناً ثانوياً، و10% نقاط تركيز.
في غرفة معيشة وابي-سابي، يمكن ترجمة القاعدة بهذه الطريقة:
60%: جدران وأرضية أو مساحة رئيسية بدرجة ميكروسيمنت هادئة.
30%: أريكة، ستائر، خشب أو خزائن بدرجة أغمق أو أكثر دفئاً.
10%: معدن، وسائد، فن جداري، إنارة أو إكسسوارات بلون أكثر وضوحاً.
ليست هذه معادلة فيزيائية. إنها أداة لضبط التوزيع البصري.
إذا كان الميكروسيمنت يغطي الأرضية والجدار والسقف، فلا تضف أثاثاً رمادياً بنفس الدرجة. أدخل الخشب أو الكتان أو الصوف حتى يصبح التباين ملمسياً أيضاً، لا لونياً فقط.
الميكروسيمنت مقابل الخرسانة المكشوفة: فرق المادة لا الصورة
الميكروسيمنت طبقة تشطيب رقيقة، بينما الخرسانة المكشوفة هي المادة الإنشائية أو الركيزة نفسها في كثير من المشاريع؛ لذلك فإن إصلاح مشكلة في الخرسانة قبل إبقائها ظاهرة يختلف جذرياً عن إصلاح تشطيب ميكروسيمنت.
قد تبدو الصورتان متشابهتين على الهاتف.
لكن في الموقع، الفرق كبير.
عندما تختار ميكروسيمنتاً، فأنت تضيف نظاماً من التحضير والطبقات والتشطيب والحماية. بيانات أحد الأنظمة المنشورة تشير إلى سماكة تطبيق بين 0.5 و3 مم، مع حد أقصى 1 مم لكل طبقة، ووقت قابلية للمشي يبلغ 2–3 ساعات في ظروف الاختبار الخاصة بالمنتج.
عندما تختار الخرسانة المكشوفة، فأنت تتعامل مع مادة موجودة بالفعل، وقد تحتاج إلى:
طحن.
تنظيف.
ملء فراغات.
معالجة تشققات.
صقل.
حماية سطحية.
معالجة بقع أو تفاوتات اللون.
إذا كانت الخرسانة جيدة، فهذا قد يكون منطقياً. وإذا كانت سيئة، فقد تصبح عملية إظهارها أكثر تعقيداً من المتوقع.
تشققات التمدد: الاختبار الذي يجب أن يسبق اللون
فواصل الحركة والتشققات النشطة يجب أن تُشخّص قبل وضع الميكروسيمنت، لأن طبقة التشطيب الرقيقة لا تلغي الحركة الموجودة أسفلها.
القاعدة العملية بسيطة:
لا تستخدم الميكروسيمنت لإخفاء حركة الركيزة.
افحص الأرضية والجدران في ضوء جانبي قوي، لأن الضوء المائل يكشف التفاوتات والشقوق التي قد لا تظهر تحت الإضاءة العامة.
سجّل:
مكان كل شق.
طوله.
عرضه التقريبي.
هل هو ثابت أم يتغير؟
هل توجد إزاحة رأسية؟
هل يمر عبر فاصل بين مواد مختلفة؟
هل توجد رطوبة بالقرب منه؟
هل يتكرر في الجدار المقابل أو السقف؟
إذا كان الشق ثابتاً
الشق الثابت والسطحي يحتاج إلى معالجة مختلفة عن الشق النشط، ولذلك يجب تحديد السبب قبل اختيار مادة الإصلاح.
إذا كان الشق مستقراً ولا توجد رطوبة أو حركة مستمرة، يمكن أن يسمح نظام التحضير المناسب بالإصلاح ثم تطبيق طبقات التشطيب.
لكن القرار لا ينبغي أن يكون:
"ضع شبكة فوقه وانتهى الأمر."
الشبكة أو التعزيز قد يكون جزءاً من نظام معين، لكنها ليست بديلاً عن معالجة فاصل حركة أو مشكلة إنشائية.
إذا كان الشق نشطاً
الشق الذي يستمر في الحركة لا ينبغي تغطيته بطبقة ميكروسيمنت رقيقة على أمل أن يبقى غير مرئي؛ يجب أولاً تحديد الحركة وتفصيل الفاصل أو الإصلاح وفق طبيعة الركيزة.
هنا توجد ثلاثة مسارات:
إصلاح الركيزة أولاً إذا كان السبب سطحياً.
الحفاظ على فاصل الحركة إذا كانت الحركة مقصودة في النظام الإنشائي.
إيقاف المشروع مؤقتاً إذا ظهرت مؤشرات على مشكلة إنشائية أو رطوبة.
هذا النوع من القرار لا ينبغي أن يعتمد على لون العينة أو صورة قبل/بعد.
الرطوبة: سبب خفي لمشاكل التشطيب
الرطوبة النشطة يمكن أن تفسد نظام تشطيب رقيق حتى عندما يبدو السطح جافاً بصرياً، ولذلك يجب إدخال فحص الرطوبة ضمن مرحلة تقييم الركيزة وليس بعد ظهور التقشر.
ابحث عن:
بقع داكنة متكررة.
رائحة رطوبة.
انتفاخ.
أملاح سطحية.
تقشر الطلاء القديم.
مناطق حول المصارف.
حواف الحمامات.
التقاء الأرضية بالجدار.
آثار تسريب سابق.
في الحمامات، لا تتعامل مع الميكروسيمنت باعتباره بديلاً عن نظام العزل المائي. التشطيب شيء، ومنع الماء من الوصول إلى الطبقات الحساسة شيء آخر.
إذا كان الحمام يحتاج إلى إعادة عزل، يجب أن تكون ميزانية العزل مستقلة عن ميزانية الميكروسيمنت.
الأداء الميكانيكي: ماذا تعني أرقام الاختبار؟
بيانات أحد أنظمة الميكروسيمنت المنشورة تسجل قوة التصاق ≥1.5 نيوتن/مم² ومقاومة اهتراء AR 0.5، لكن هذه الأرقام تصف منتجاً محدداً ولا يمكن تعميمها على جميع الأنظمة.
هذه الأرقام مفيدة فقط إذا قرأت معها شروط الاختبار.
قوة الالتصاق
قوة التصاق 1.5 نيوتن/مم² ليست وعداً بأن أي سطح سيحقق الرقم نفسه بعد التنفيذ.
إذا كانت الركيزة:
ملوثة بالزيت.
مغبرة.
ضعيفة.
رطبة.
غير مستقرة.
مغطاة بطبقة مفصولة.
فإن أفضل منتج في العالم لن يعوض عن سوء التحضير.
مقاومة الاهتراء
تصنيف AR 0.5 في بيانات المنتج المذكور يعطي مؤشراً اختبارياً على مقاومة التآكل، لكنه لا يخبرك وحده بما سيحدث في منزلك بعد سنوات من الرمل والأحذية والأثاث المتحرك والتنظيف.
اسأل عن:
نوع اختبار الاهتراء.
النظام الكامل وليس طبقة واحدة.
نوع السيلر.
تعليمات التنظيف.
دورات إعادة الحماية.
ملاءمة المنتج للأرضيات التجارية أو السكنية.
اختبار حراري
الميكروسيمنت نفسه ليس طبقة عزل حراري؛ لذلك يجب تقييم التمدد الحراري على مستوى الركيزة والنظام المركب، خصوصاً فوق التدفئة الأرضية أو قرب الواجهات الزجاجية المعرضة للشمس.
إذا كانت الأرضية تحتوي على تدفئة أرضية، اطلب من المقاول تأكيد توافق النظام المحدد مع هذه الحالة. بعض المنتجات مصممة للاستخدام فوق التدفئة الأرضية، لكن هذا لا يعني أن كل التركيبات متساوية. أحد الأنظمة المنشورة يذكر صراحة استخدامه في الأرضيات ذات التدفئة تحت الأرضية.
الصدى الصوتي: المشكلة التي لا تظهر في صورة التصميم
غرفة المعيشة ذات الأرضية الصلبة والجدران الملساء والأثاث القليل قد تصل إلى زمن ارتداد يقارب 0.8–1.2 ثانية في أمثلة سكنية منشورة، بينما تستهدف الإرشادات السكنية الشائعة نحو 0.5 ثانية أو أقل؛ لذلك يجب معالجة الصوت بالتوازي مع اختيار التشطيب.
الميكروسيمنت ليس مادة امتصاص صوتي لمجرد احتوائه على مركبات إسمنتية أو راتنجية.
عندما يكون السطح:
كثيفاً.
صلباً.
مستمراً.
أملساً نسبياً.
فإنه يعكس جزءاً كبيراً من الطاقة الصوتية بدلاً من امتصاصها.
المشكلة تتضاعف في المخطط المفتوح:
ميكروسيمنت + زجاج + مطبخ مفتوح + سقف جبسي أملس + أثاث قليل = بيئة صوتية تحتاج إلى تصميم مقصود.
لماذا لم نعد نستخدم رقم 2.73 ثانية؟
لا يمكن اعتبار قيمة 2.73 ثانية نتيجة عامة لغرفة معيشة من دون ذكر حجم الغرفة، ومساحات الأسطح، ومعاملات الامتصاص، وحالة التأثيث؛ لذلك الأفضل استخدام معادلة قابلة لإعادة الحساب بدلاً من رقم منفرد غير قابل للتحقق.
زمن الارتداد يمكن تقديره مبدئياً بمعادلة سابين:
RT60 = 0.161 × V ÷ A
حيث:
V حجم الغرفة بالمتر المكعب.
A مساحة الامتصاص المكافئة، وتساوي مجموع مساحة كل سطح مضروبة في معامل امتصاصه.
مثلاً، إذا كانت الغرفة 6 × 4 × 2.7 م، فالحجم:
64.8 م³
لكن الحجم وحده لا يكفي.
يجب معرفة الأرضية والجدران والسقف والنوافذ والأثاث والمنسوجات. لذلك فإن أي رقم RT60 دقيق دون هذه المدخلات ينبغي التعامل معه باعتباره تقديراً لا قياساً.
الهدف العملي
لغرفة معيشة سكنية مفروشة، اجعل هدف التصميم قريباً من 0.5 ثانية أو أقل عندما يكون ذلك متوافقاً مع معيار المشروع، مع اعتبار حجم الغرفة واستخدامها؛ فالإرشادات المنشورة تربط الراحة السمعية بزمن ارتداد منخفض نسبياً.
لا تحتاج إلى تحويل غرفة المعيشة إلى استوديو تسجيل.
لكن يجب أن تستطيع:
فهم الكلام من الطرف الآخر.
مشاهدة التلفاز دون رفع الصوت بشكل مبالغ.
إجراء محادثة دون تكرار مزعج.
تجنب صدى الرفرفة بين الجدران المتوازية.
كيف تعالج الصدى من دون إفساد وابي-سابي؟
يمكن تقليل الانعكاسات بإضافة عناصر ماصة مثل السجاد والستائر والأثاث المنجد، بحيث يبقى الميكروسيمنت هو الخلفية البصرية بينما تتولى المنسوجات والأثاث جزءاً من الوظيفة الصوتية.
ابدأ بالعناصر التي تحتاجها أصلاً.
السجاد
السجادة الكبيرة أفضل من سجادة صغيرة عائمة في منتصف الغرفة عندما يكون الهدف جمع منطقة الجلوس بصرياً وتقليل الانعكاس الصوتي.
طبّق قاعدة "احتواء السجادة":
يجب أن تقع الأرجل الأمامية للأريكة على السجادة بما لا يقل عن 15 سم.
في غرفة كبيرة، يمكن أن تقع الأرجل الأربع على السجادة.
لا تجعل السجادة أصغر من منطقة الجلوس إلى درجة تبدو كجزيرة منفصلة.
إذا كانت المساحة تسمح، اجعل السجادة تغطي الجزء الأكبر من منطقة الحوار.
المسافة بين الأريكة وطاولة القهوة
اترك نحو 35–45 سم بين حافة الأريكة وطاولة القهوة في منطقة الجلوس الرئيسية، بحيث يبقى الاستخدام مريحاً من دون استهلاك المساحة في فراغات مبالغ فيها.
هذا الرقم ليس قانون بناء. إنه نطاق تخطيطي عملي.
إذا كانت الغرفة ضيقة، يمكن تقليل المسافة ضمن حدود الراحة، لكن لا تجعل الطاولة ملاصقة للأريكة بحيث يصعب الجلوس أو التنظيف.
الممر الرئيسي
احتفظ بنحو 75–90 سم للممر الرئيسي عندما تسمح المساحة، لأن الميكروسيمنت لا يعالج ازدحام الحركة مهما كان مظهره نظيفاً.
في غرفة معيشة صغيرة، ابدأ بقياس المسار بين:
المدخل.
الأريكة.
التلفاز.
المطبخ.
الشرفة.
الممر المؤدي إلى غرف النوم.
ثم ضع الأثاث.
لا تبدأ بالعكس.
التصميم الصناعي والصوت: أين تظهر المشكلة؟
التصميم الصناعي الذي يجمع الخرسانة والطوب والمعدن والزجاج قد يرفع الانعكاسات الصوتية إذا لم توجد مساحة كافية للامتصاص، لذلك يجب أن يكون النسيج جزءاً من التصميم لا إضافة لاحقة.
يمكن الحفاظ على الطابع الصناعي مع:
سجادة صوفية كبيرة.
ستائر سميكة.
أريكة قماشية.
ألواح صوتية مكسوة بالقماش.
مكتبة مفتوحة.
خشب طبيعي.
سقف صوتي مخفي أو معلق جزئياً.
بهذه الطريقة لا تحتاج إلى طلاء كل شيء بالرمادي أو تغطية كل سطح بمادة ماصة.
التصميم الجيد يخفي المعالجة الصوتية عندما لا تريد أن تصبح هي نقطة التركيز.
الإضاءة: لماذا يغير الضوء قراءة الميكروسيمنت؟
الإضاءة الجانبية القوية تكشف تفاوتات الميكروسيمنت أكثر من الإضاءة الأمامية، لذلك يجب اختبار العينة تحت ظروف الإضاءة الفعلية قبل اعتماد اللون والملمس.
ضع عينة لا تقل عن نحو 60 × 60 سم.
ثم افحصها:
صباحاً.
ظهراً.
ليلاً.
تحت إضاءة السقف.
تحت إضاءة جانبية.
بجانب لون الخشب.
بجانب لون الأريكة.
إذا كنت تستخدم إضاءة خطية أو مسارات مغناطيسية أو سبوتات غائرة، فإن زاوية الشعاع تصبح جزءاً من تقييم التشطيب. للحصول على مقارنة أعمق في السقف والإضاءة، راجع الإضاءة الغائرة بدون إطار مقابل المسارات المغناطيسية: شروخ ألواح الجبس، زوايا الوهج، ومؤشر تجسيد الألوان.
لا تختبر اللون على شاشة الهاتف
شاشة الهاتف تعرض اللون، لكنها لا تعرض الطريقة التي تتغير بها ظلال سطح الميكروسيمنت مع زاوية الضوء وملمس المالج.
لهذا السبب يجب أن تكون العينة:
بنفس درجة اللون.
بنفس السيلر.
بنفس الملمس.
بنفس تقنية التطبيق.
وفي المكان نفسه تقريباً الذي ستستخدم فيه المادة.
60-30-10 في التصميم الصناعي
التصميم الصناعي يحتاج إلى توزيع بصري واضح حتى لا يتحول تجمع الخرسانة والمعدن والطوب إلى كتلة باردة؛ قاعدة 60-30-10 تساعد على تنظيم الكتلة اللونية مع الحفاظ على الخشونة المادية.
مثال:
60% قاعدة:
خرسانة رمادية دافئة أو ميكروسيمنت حجري.
30% لون ثانوي:
خشب جوزي، جلد بني، طوب دافئ أو معدن داكن.
10% تركيز:
أسود، نحاسي معتق، أخضر زيتوني أو لون فني قوي.
إذا كان الجدار الطوبي يمثل 30% من المشهد، لا تضف ثلاثة أنواع أخرى من الطوب الصناعي في الأثاث والإكسسوارات. اترك المادة الأصلية تقوم بالعمل.
متى يصبح وابي-سابي قريباً أكثر من اللازم من الصناعي؟
الحد الفاصل بين وابي-سابي والصناعي ليس درجة الرمادي؛ بل مستوى الخشونة، وطريقة إبراز المادة، ودرجة التقنية الظاهرة في التفاصيل.
النتيجة تميل إلى وابي-سابي عندما ترى:
خشباً طبيعياً.
أقمشة غير لامعة.
خطوطاً بسيطة.
ألواناً منخفضة التشبع.
تفاصيل قليلة.
تفاوتاً سطحياً ناعماً.
وتصبح أقرب إلى الصناعي عندما ترى:
معدنًا مكشوفاً.
أنابيب ظاهرة.
خرسانة خشنة.
طوباً مكشوفاً.
مسارات إنارة تقنية.
وصلات وبراغي وتفاصيل إنشائية ظاهرة.
يمكن الجمع بين الاثنين.
لكن يجب تحديد أي لغة هي الخلفية وأيها هي نقطة التركيز.
التكلفة: لا تقارن سعر المادة بسعر المشروع
سعر المتر أو القدم المربعة لا يكفي لتقدير الميزانية، لأن تحضير الركيزة، وعدد الزيارات، والطبقات، والعزل، والحواف، وإعادة تركيب التجهيزات قد تغير السعر النهائي بشكل كبير.
في لوس أنجلوس، تنشر جهات تنفيذية حالياً نطاقاً تقريبياً قدره 15–35 دولاراً للقدم المربعة لأعمال الميكروسيمنت، مع حد أدنى منشور للمشروع يبلغ 3500 دولار لدى أحد المقاولين؛ كما تذكر تلك الجهة أن المشروع المعتاد قد يتطلب 3–5 زيارات تشمل التحضير والطبقات والإغلاق. هذه أرقام سوقية من جهات تنفيذية وليست سعراً رسمياً للسوق بأكمله.
تقدير سريع لمساحة الأرضية
باستخدام نطاق 15–35 دولاراً للقدم المربعة كمرجع أولي لسوق لوس أنجلوس، فإن مساحة 20 م² تعادل نحو 215 قدماً مربعة، أي نطاقاً حسابياً يقارب 3225–7525 دولاراً قبل أي حد أدنى للمشروع أو أعمال إضافية؛ لذلك يجب ألا يُستخدم الرقم كعرض سعر نهائي.
| المساحة | الحالة: ركيزة مستقرة وتفاصيل بسيطة | الحالة: ركيزة تحتاج معالجة وتفاصيل معقدة | ما الذي قد يغير السعر؟ |
|---|---|---|---|
| 10 م² | نحو 1,615–3,767 دولاراً حسابياً | قد تتجاوز ذلك بوضوح بسبب الحد الأدنى والإصلاحات | الحد الأدنى للمشروع، التحضير، الحواف |
| 20 م² | نحو 3,229–7,534 دولاراً حسابياً | قد ترتفع مع التشققات والعزل والتفاصيل | إصلاح الركيزة، عدد الطبقات، السيلر |
| 30 م² | نحو 4,844–11,301 دولاراً حسابياً | أعلى إذا كانت الأرضية غير مستقرة أو كثيرة التفاصيل | الفواصل، الأبواب، الدرج، المناطق الرطبة |
الحسابات أعلاه ناتجة عن تحويل المساحة إلى قدم مربعة وضربها في نطاق 15–35 دولاراً/قدم² المنشور لأعمال لوس أنجلوس. وهي ميزانية أولية وليست سعراً مضموناً، كما أن الحد الأدنى للمشروع قد يجعل المساحات الصغيرة أغلى فعلياً من الحساب النظري.
ماذا لو كانت الميزانية محدودة؟
عندما تكون الميزانية محدودة، خفّض مساحة التطبيق قبل أن تخفّض جودة التحضير؛ لأن اختصار خطوات الركيزة أو الحماية قد يخلق تكلفة إصلاح أكبر لاحقاً.
يمكن مثلاً تطبيق الميكروسيمنت على:
جدار التلفاز.
مدخل المنزل.
جدار واحد في الحمام.
جزيرة المطبخ.
منطقة محددة بدلاً من الأرضية الكاملة.
لكن لا تطلب من المقاول حذف طبقة أساسية أو السيلر المناسب فقط للوصول إلى رقم أقل.
ماذا يحدث إذا لم تنجح نتيجة الفحص؟
أفضل قرار يعتمد على نتيجة الاختبار لا على تفضيل الأسلوب؛ فإذا فشلت الركيزة أو الرطوبة أو الفواصل، يجب تعديل نطاق العمل قبل اختيار التشطيب.
إذا كانت الرطوبة مرتفعة
أوقف تطبيق الميكروسيمنت حتى يُحدد مصدر الرطوبة ويُعالج، لأن تغطية السبب لا تعني أن الماء اختفى.
المسار:
رطوبة → تشخيص المصدر → إصلاح → تجفيف/تحقق → إعادة تقييم الركيزة → تطبيق.
إذا كانت هناك فواصل حركة واضحة
احتفظ بتفاصيل الحركة بدلاً من محاولة تحويل الأرضية إلى سطح بصري متصل بالكامل.
المسار:
فاصل حركة → تحديد وظيفته → اختيار تفصيل متوافق → استمرار الفاصل خلال التشطيب.
إذا كانت الخرسانة الأصلية جيدة
إذا كانت الخرسانة مستقرة وجميلة ولا توجد حاجة إلى توحيد اللون، اختبر خيار الإبقاء عليها قبل تغطيتها.
المسار:
خرسانة جيدة → اختبار صقل وحماية → تقييم اللون والبقع → مقارنة التكلفة → قرار الإبقاء أو التغطية.
إذا كانت الغرفة صدىها مرتفع
لا تغيّر الميكروسيمنت تلقائياً؛ عالج كمية الامتصاص الصوتي أولاً لأن المشكلة قد تكون في مجموع الأسطح لا في الأرضية وحدها.
المسار:
قياس/تقدير RT60 → إضافة سجاد وستائر وأثاث منجد → إعادة التقييم → إضافة معالجة صوتية مخفية إذا لزم.
خطوة بخطوة: استخدام مخطط الغرفة بالذكاء الاصطناعي قبل الشراء
يمكن لتصور الغرفة بالذكاء الاصطناعي أن يقلل مخاطر القرار البصري قبل الشراء، لكن دوره هو مقارنة التخطيطات والألوان والمواد، وليس تشخيص الرطوبة أو اعتماد سلامة الركيزة.
الخطوة 1: تصوير الغرفة
الصورة الجيدة تبدأ من مستوى العين وبضوء طبيعي متوازن، لأن المنظور المبالغ فيه يمكن أن يجعل الغرفة تبدو أكبر أو أصغر من الواقع.
نفّذ الآتي:
افتح الستائر.
شغّل الإضاءة الطبيعية.
صوّر من ارتفاع قريب من مستوى العين.
استخدم زاوية واسعة باعتدال.
تجنب العدسة شديدة الاتساع التي تشوه الجدران.
صوّر الزوايا الأربع إن أمكن.
التقط صورة واضحة للأرضية والجدار والسقف.
لا ترتب الغرفة بشكل مصطنع لإخفاء مشكلاتها.
الغرض هو الحصول على صورة تمثل الواقع.
الخطوة 2: إدخال نوع الغرفة والأسلوب
عند المقارنة، غيّر متغيراً واحداً في كل مرة؛ قارن أولاً الميكروسيمنت الوابي-سابي مع الصناعي، ثم اختبر الألوان والأثاث والإضاءة.
جرّب مثلاً:
غرفة معيشة + ميكروسيمنت رملي + وابي-سابي.
غرفة معيشة + ميكروسيمنت رمادي دافئ + صناعي.
غرفة معيشة + خرسانة مكشوفة + خشب.
غرفة معيشة + ميكروسيمنت + أثاث من الكتان.
غرفة معيشة + ميكروسيمنت + معدن أسود.
بهذه الطريقة تعرف هل المشكلة في المادة أم في توزيع الأثاث.
الخطوة 3: مقارنة الصور قبل وبعد
قارن الصورة الأصلية مع التصور الجديد على أربعة محاور: حجم الأثاث، الحركة، توزيع اللون، ومكان العناصر الصلبة؛ ولا تعتمد على جمال الصورة وحده.
اسأل:
هل أصبح الممر أضيق؟
هل السجادة كبيرة بما يكفي؟
هل الأريكة تستهلك الجدار بالكامل؟
هل 60% من المشهد أصبح لوناً واحداً؟
هل المعدن والخرسانة أكثر من اللازم؟
هل توجد مساحة كافية حول طاولة القهوة؟
هل مصدر الضوء يضرب سطح الميكروسيمنت بزاوية تكشف التفاوت؟
الخطوة 4: تحويل التصور إلى قائمة شراء
التصور المفيد هو الذي ينتج قرارات قابلة للقياس، مثل مقاس السجادة وارتفاع الأثاث وعرض الممر، لا مجرد صورة جميلة.
حوّل النتيجة إلى قائمة:
لون الميكروسيمنت.
نوع الخشب.
لون الأريكة.
مقاس السجادة.
موقع التلفاز.
عرض طاولة القهوة.
مكان الإنارة.
الستائر.
المعالجة الصوتية.
مسارات الحركة.
ثم قارن هذه القائمة بقياسات الغرفة الحقيقية.
👉 جرّب إعادة تصميم غرفتك مجاناً باستخدام مخطط الغرفة بالذكاء الاصطناعي
مثال عملي: غرفة معيشة بمساحة 20 م²
في غرفة 20 م²، يمكن الجمع بين ميكروسيمنت وابي-سابي وأثاث مريح دون التضحية بالحركة إذا حُجز الممر الرئيسي أولاً ثم وُزعت منطقة الجلوس حوله.
افترض غرفة:
5 × 4 م.
ارتفاع 2.7 م.
باب في أحد الجدران القصيرة.
نافذة واسعة في الجدار المقابل.
مطبخ مفتوح على أحد الجانبين.
التخطيط الأول: وابي-سابي
ضع:
أريكة بعرض يقارب 220 سم.
سجادة كبيرة تحت منطقة الجلوس.
طاولة قهوة مستديرة.
خزانة منخفضة.
خشب طبيعي.
ستائر كتانية.
ميكروسيمنت رملي.
اترك المسار بين المدخل والمطبخ في نطاق يقارب 75–90 سم حيث تسمح المساحة.
ثم ضع طاولة القهوة على بعد نحو 35–45 سم من الأريكة.
التخطيط الثاني: صناعي
احتفظ بنفس هندسة الأثاث، لكن غيّر:
الميكروسيمنت الرملي إلى رمادي دافئ أو خرسانة مكشوفة.
الخشب إلى خشب أغمق.
الإكسسوارات إلى معدن أسود.
الإنارة إلى مسارات واضحة.
بعض الجدار إلى طوب أو مادة أصلية.
لا تغيّر الأثاث والمادة والإضاءة كلها دفعة واحدة إذا كنت تريد معرفة سبب نجاح أو فشل التصميم.
المقارنة
التصميم الذي يوفر الممر نفسه ومساحة جلوس مماثلة ويحقق توازناً صوتياً أفضل هو الأكثر قابلية للتنفيذ، حتى لو بدت الصورة الثانية أكثر إثارة بصرياً.
هذه نقطة مهمة في أدوات الذكاء الاصطناعي: الصورة ليست مخطط تنفيذ.
هي طبقة لاتخاذ القرار البصري.
هل يناسب الميكروسيمنت المطابخ؟
الميكروسيمنت يمكن استخدامه في المطابخ، لكن النجاح يعتمد على نظام الحماية والتفاصيل حول الماء والحرارة والحواف أكثر من اللون أو الملمس.
في المطبخ افحص:
الحافة حول الحوض.
التقاء سطح العمل بالجدار.
منطقة غسالة الصحون.
الماء المتناثر حول الحنفية.
الحرارة قرب الأجهزة.
المواد الكيميائية المستخدمة في التنظيف.
الحواف المكشوفة.
إذا كان الميكروسيمنت على سطح العمل، فلا تستخدم مواصفات الأرضيات تلقائياً. يجب أن يكون النظام مناسباً للوظيفة المقصودة، خصوصاً إذا كانت هناك متطلبات صحية أو مقاومة كيميائية أو تماس متكرر بالماء.
هل يناسب الحمامات؟
في الحمام، يجب فصل قرار الميكروسيمنت عن قرار العزل المائي؛ فالتشطيب النهائي لا يحل محل طبقة العزل المطلوبة خلفه.
افحص:
الأرضية.
منطقة الدش.
المصارف.
الزوايا.
اختراقات الأنابيب.
عتبة الباب.
التقاء الجدار بالأرضية.
ولا تعتمد على عبارة تسويقية مثل "مقاوم للماء" وحدها.
اطلب مواصفات النظام الكامل:
الركيزة.
العزل.
البرايمر.
طبقات الميكروسيمنت.
السيلر.
تفاصيل الزوايا.
تعليمات الصيانة.
الصيانة: وابي-سابي لا يعني إهمال السطح
الملمس غير المثالي جزء من التصميم، لكن السيلر المتضرر أو البقع الكيميائية أو الرطوبة ليست عناصر جمالية مقصودة؛ لذلك يجب الفصل بين التقدم الطبيعي في العمر والضرر الذي يحتاج إلى معالجة.
ضع جدولاً بسيطاً:
أسبوعياً
إزالة الرمل والغبار.
تنظيف لطيف.
تجنب المواد الكاشطة.
شهرياً
فحص المناطق عالية الاستخدام.
مراقبة تغير اللمعان.
فحص الحواف.
عند ظهور خدش
حدد هل هو في السيلر أم الطبقة الأساسية.
لا تستخدم مادة إصلاح عشوائية.
ارجع إلى نظام المنتج.
عند ظهور تشقق
راقب هل يتغير.
صوّر المنطقة.
قِس الحركة إن أمكن.
لا تضع طبقة تجميلية فوقه مباشرة.
جدول معالجة العيوب
كلما اكتُشف العيب في مرحلة أبكر، زادت احتمالية إصلاحه دون إعادة بناء مساحة كبيرة؛ لذلك يجب ربط نوع العيب بمستوى التدخل بدلاً من إعادة الطلاء تلقائياً.
| المشكلة | التشخيص الأول | الإجراء التالي | مستوى التدخل |
|---|---|---|---|
| خدش في السيلر | الطبقة الأساسية سليمة | إصلاح أو إعادة حماية وفق النظام | منخفض |
| اختلاف اللمعان | توزيع غير متجانس للحماية | معالجة السطح ثم إعادة الطبقة المناسبة | منخفض–متوسط |
| بقعة | تحديد مصدرها أولاً | تنظيف أو إصلاح بعد إزالة السبب | متوسط |
| تشقق شعري ثابت | فحص الركيزة | إصلاح موضعي وفق النظام | متوسط |
| تشقق متحرك | حركة مستمرة | تشخيص الفاصل أو الركيزة | مرتفع |
| تقشر | ضعف التصاق أو رطوبة محتملة | إزالة المنطقة الضعيفة وإعادة البناء | مرتفع |
| تسرب | مشكلة عزل | إصلاح العزل ثم إعادة التشطيب | مرتفع جداً |
| فشل عند فاصل حركة | تفصيل غير صحيح | إعادة تفصيل الفاصل | مرتفع |
| خطة تنفيذ عملية خلال 7 أيام |
توزيع المشروع على سبعة أيام لا يعني أن التطبيق نفسه يستغرق سبعة أيام؛ الهدف هو منع قرار التصميم والشراء قبل اكتمال الفحوص الأساسية.
اليوم الأول: قياس وتصوير
ابدأ بالمقاسات والصور قبل اختيار اللون، لأن التصميم المرئي يحتاج إلى بيانات حقيقية عن الغرفة.
سجل:
الطول.
العرض.
الارتفاع.
الأبواب.
النوافذ.
مواقع الكهرباء.
مصادر الضوء.
الممرات.
الأثاث الموجود.
صوّر الشقوق والحواف والمناطق الرطبة.
اليوم الثاني: فحص الركيزة
لا تعتمد الميكروسيمنت إذا كانت الركيزة غير مستقرة؛ أصلح المشكلة أو غيّر نطاق المشروع قبل شراء المادة.
تحقق من:
التماسك.
الرطوبة.
الشقوق.
الفواصل.
التفاوت.
المواد القديمة.
مناطق الانفصال.
إذا كانت هناك مشكلة غير واضحة، اطلب تشخيصاً متخصصاً بدلاً من التخمين.
اليوم الثالث: العينة
اعتمد اللون والملمس من عينة حقيقية لا من شاشة رقمية.
اصنع لوحة 60 × 60 سم على الأقل، واختبرها في المكان نفسه.
راقب:
الصباح.
الظهر.
المساء.
الضوء المباشر.
الضوء الجانبي.
اليوم الرابع: الاختبار الصوتي
اختبر الكلام والتصفيق والصدى قبل تثبيت جميع الأسطح الصلبة، لأن إضافة الامتصاص الصوتي في البداية أسهل من إدخاله بعد اكتمال الغرفة.
إذا كان الصدى واضحاً:
أضف سجادة.
أضف ستائر.
اختر أريكة منجدة.
ادرس ألواحاً صوتية مخفية.
أعد تقييم الغرفة.
يمكن استخدام معادلة سابين كتقدير أولي، لكن الغرف المعقدة تحتاج إلى توزيع دقيق للمواد ومعاملات الامتصاص.
اليوم الخامس: محاكاة الذكاء الاصطناعي
في اليوم الخامس، حوّل القياسات والصور إلى مقارنة بصرية منظمة: صورة أصلية، نسخة وابي-سابي، نسخة صناعية، ثم نسخة معدلة بعد ضبط الأثاث والإضاءة.
نفذ أربع مراحل:
رفع الصورة: استخدم صورة واضحة للغرفة الحقيقية.
اختيار المعايير: حدد نوع الغرفة، وابي-سابي أو صناعي، ودرجة اللون والمواد الرئيسية.
المقارنة: قارن الصور مع الأصل، وراقب الأثاث والممرات واللون وليس الجمال فقط.
التنفيذ: حوّل النتيجة إلى قائمة شراء ومقاسات واختبارات ميدانية.
👉 ابدأ تجربة إعادة تصميم الغرفة مجاناً عبر الإنترنت
اليوم السادس: مراجعة العرض
العرض القابل للمقارنة يجب أن يوضح النظام الكامل من الركيزة إلى السيلر، وليس فقط عدد الأمتار وسعرها.
اطلب أن يتضمن:
تحضير الركيزة.
إصلاح الشقوق.
معالجة الفواصل.
البرايمر.
التعزيز عند الحاجة.
طبقات الميكروسيمنت.
السيلر.
العزل في المناطق الرطبة.
الحواف.
إزالة التجهيزات.
إعادة تركيبها.
مدة التنفيذ.
شروط الضمان.
اليوم السابع: قرار الشراء
لا تعتمد المقاول أو اللون قبل أن تتطابق نتيجة الفحص الفني مع الصورة التصميمية والميزانية.
يجب أن تستطيع الإجابة بـ"نعم" على:
الركيزة مستقرة.
الرطوبة تحت السيطرة.
الفواصل مفهومة.
الصوت مقبول.
العينة معتمدة.
السعر مفهوم.
الجدول الزمني واضح.
نظام الحماية محدد.
قائمة التحقق النهائية قبل التعاقد
قست طول الغرفة وعرضها وارتفاعها.
صورت الغرفة من عدة زوايا وبإضاءة طبيعية.
سجلت جميع الشقوق الموجودة.
تحققت من وجود فواصل حركة.
فحصت مناطق الرطوبة والتسرب.
تأكدت من استقرار الركيزة.
طلبت ورقة البيانات الفنية للمنتج المحدد.
تحققت من السماكة المعلنة للنظام.
قارنت قوة الالتصاق المنشورة بشروط الاختبار.
تحققت من مقاومة الاهتراء المناسبة للاستخدام.
تأكدت من توافق النظام مع التدفئة الأرضية إذا كانت موجودة.
اختبرت عينة حقيقية بمقاس لا يقل تقريباً عن 60 × 60 سم.
شاهدت العينة في ضوء النهار والليل.
طبقت قاعدة 60-30-10 لتوزيع الألوان والمواد.
تركت نحو 75–90 سم للممر الرئيسي حيث تسمح المساحة.
تركت نحو 35–45 سم حول منطقة طاولة القهوة عند تخطيط الجلوس.
تأكدت من أن الأرجل الأمامية للأريكة تدخل على السجادة بما لا يقل عن 15 سم.
اختبرت الصدى أو قدرت زمن الارتداد قبل التنفيذ.
خصصت عناصر ماصة للصوت إذا كانت الأسطح الصلبة كثيرة.
قارنت وابي-سابي مع خيار إبقاء الخرسانة الأصلية مكشوفة.
قارنت التكلفة على أساس النظام الكامل لا المادة فقط.
طلبت تفاصيل التحضير والإصلاح من المقاول.
طلبت تفاصيل السيلر والحماية.
في الحمام، تحققت من العزل المائي بشكل مستقل.
استخدمت تصوراً بالذكاء الاصطناعي لمقارنة الأثاث واللون والإضاءة.
قارنت التصور بالصورة الأصلية لا بصورة مرجعية فقط.
حصلت على جدول زمني مكتوب.
فهمت شروط الضمان والصيانة.
لم أوافق على تغطية تشقق نشط دون تشخيص.
لم أعتبر "مقاوم للماء" بديلاً عن العزل المائي.
لم أختصر طبقات النظام فقط لتقليل السعر.
الأسئلة الشائعة
هل الميكروسيمنت أفضل من الخرسانة المكشوفة؟
الاختيار يعتمد على حالة الخرسانة ووظيفة الغرفة؛ الميكروسيمنت مناسب عندما تحتاج إلى طبقة تشطيب متصلة ومظهر متحكم به، بينما يمكن أن تكون الخرسانة الأصلية خياراً منطقياً إذا كانت مستقرة وجيدة بصرياً.
إذا كانت الخرسانة تحتوي على إصلاحات كثيرة أو اختلافات لون كبيرة، فقد يوفر الميكروسيمنت مظهراً أكثر اتساقاً. وإذا كانت الخرسانة تحمل قيمة معمارية واضحة، فالتغطية قد تزيل جزءاً من شخصية المكان.
هل الميكروسيمنت يتشقق؟
يمكن أن تظهر التشققات عندما تنتقل حركة الركيزة أو الفواصل إلى طبقة التشطيب، لذلك يعتمد الأداء على الركيزة والتحضير وتفاصيل الحركة أكثر من الاسم التجاري للمادة.
بيانات أحد الأنظمة المنشورة تشير إلى قوة التصاق ≥1.5 نيوتن/مم² ومقاومة اهتراء AR 0.5، لكنها لا تعني أن أي تطبيق فوق أي ركيزة سيحقق النتيجة نفسها.
هل الميكروسيمنت مناسب للحمام؟
يمكن استخدام بعض الأنظمة في المناطق الرطبة، لكن نظام العزل المائي يجب أن يُقيّم بصورة مستقلة عن طبقة الميكروسيمنت.
قبل التنفيذ، تحقق من توافق النظام مع الحمامات والدش، ومن تفاصيل المصارف والزوايا واختراقات الأنابيب والسيلر.
هل الميكروسيمنت يجعل الغرفة أكثر صدى؟
الميكروسيمنت سطح صلب، لذلك قد يزيد الانعكاس الصوتي إذا أضيف إلى غرفة تحتوي أصلاً على أسطح صلبة كثيرة وقليل من الأثاث الماص.
المشكلة ليست في الميكروسيمنت وحده. مجموع الأسطح هو الذي يحدد البيئة الصوتية.
في الإرشادات السكنية المنشورة، يظهر هدف RT60 يقارب 0.5 ثانية أو أقل لغرف المعيشة، بينما يمكن للمساحات ذات الأرضيات الصلبة والأثاث القليل أن تتجاوز ذلك بوضوح.
كم يكلف الميكروسيمنت في لوس أنجلوس؟
النطاق المنشور حالياً لدى أحد مقاولي لوس أنجلوس هو نحو 15–35 دولاراً للقدم المربعة، مع حد أدنى معلن للمشروع قدره 3500 دولار؛ السعر الفعلي يتغير بحسب الركيزة والتفاصيل وعدد الزيارات.
لذلك، مساحة صغيرة جداً قد لا تستفيد من الحساب الحسابي البسيط لكل قدم مربعة بسبب الحد الأدنى للمشروع.
هل يمكن وضع الميكروسيمنت فوق البلاط الموجود؟
بعض الأنظمة مصممة للتطبيق فوق البلاط القائم، لكن صلاحية ذلك تعتمد على تماسك البلاط والركيزة والتحضير ونظام المنتج المحدد.
لا تفترض أن البلاط الموجود صالح لمجرد أنه يبدو سليماً. يجب فحص القطع المفصولة والفواصل والرطوبة والتفاوت.
هل أختار وابي-سابي أم التصميم الصناعي؟
استخدم وابي-سابي عندما تريد خلفية هادئة وملمساً طبيعياً وتفاصيل قليلة، واستخدم اللغة الصناعية عندما تكون الخرسانة والطوب والمعدن والتفاصيل التقنية جزءاً أصيلاً من هوية المبنى.
يمكن الجمع بينهما، لكن حافظ على تسلسل بصري واضح: مادة أساسية، مادة ثانوية، ثم عناصر تركيز.
هل يمكن للذكاء الاصطناعي تحديد ما إذا كانت الأرضية صالحة للميكروسيمنت؟
لا؛ أداة التصور البصري مناسبة لمقارنة اللون والمواد والأثاث والتخطيط، لكنها لا تستبدل فحص الرطوبة أو اختبار التصاق أو تشخيص التشققات.
استخدم الصورة لاتخاذ القرار البصري، واترك التشخيص الفني للفحص الميداني وبيانات المنتج.
القرار النهائي
الميكروسيمنت بأسلوب وابي-سابي ينجح عندما يكون الهدف سطحاً هادئاً ومتصلاً مع ملمس طبيعي، بينما ينجح التصميم الصناعي عندما تكون المواد الأصلية والتفاصيل الإنشائية جزءاً من هوية المكان؛ وفي الحالتين، الركيزة والصوت والتكلفة هي التي تحدد قابلية التنفيذ.
قبل شراء أي مادة، افعل ثلاثة أشياء بالترتيب:
أولاً: افحص الركيزة والشقوق والرطوبة والفواصل.
ثانياً: اختبر العينة والصوت والتخطيط الفعلي للغرفة.
ثالثاً: استخدم تصوراً بالذكاء الاصطناعي لمقارنة وابي-سابي والصناعي قبل شراء الأثاث والإنارة والمواد.
الميكروسيمنت ليس مجرد لون إسمنتي. والتصميم الصناعي ليس مجرد خرسانة سوداء ومعدن.
النتيجة الجيدة تأتي عندما تتطابق المادة مع الركيزة، والتشطيب مع الصوت، والأثاث مع الحركة، والميزانية مع نطاق العمل.
ولذلك، إذا كانت الركيزة مستقرة وتريد مظهراً هادئاً قليل الفواصل، ابدأ باختبار ميكروسيمنت وابي-سابي. وإذا كانت الخرسانة أو الطوب الأصليان في حالة جيدة ويملكان قيمة معمارية، ابدأ بمقارنة تكلفة الإبقاء عليهما قبل تغطيتهما.
👉 جرّب إعادة تصميم غرفتك مجاناً واختبر الميكروسيمنت الوابي-سابي والتصميم الصناعي قبل الشراء
قلّل التكرار وادمج الأقسام المتشابهة
أضف جدول قرار لأصحاب المنازل.